
|


|
|
Installing BioniX Background Changer
Three facts you need to know
Installing BioniX Background Changer for the first time
Installing BioniX on Windows 10
To keep things simple (and cheap) we don't use digital signatures. Because of this on some computers, Windows 10 might report that the publishher is unknown. That's ok. Simply continue with the instalation:
You will see this message just once. Notice: this is not some kind of useful antivirus feature. If you want to disable it, see this webpage and rely on your antivirus. BioniX will pass your antivirus check without problems.
Installing BioniX on Windows Vista, Windows 7, Windows 8
BioniX is fully compatible with the new Windows operation systems. However, some users may see this message:
Simply choose "This program installed correctly" instead of "Reinstall". That's all.
Updating/upgrading to a new version
It not necessary to uninstall the old version before installing a new one!
Install BioniX to Program Files
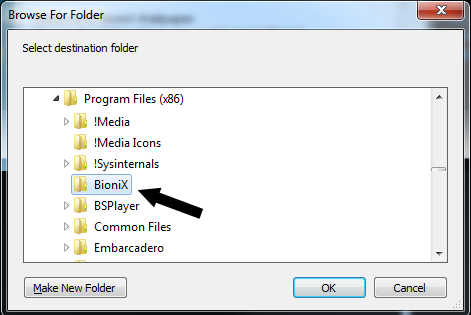
Program Files is a system-protected folder. To install the program there, just start the Setup: 
Navigate to Program Files (x86) then click the "Make new folder": 
Create a folder called "Bionix" (or something similar). The system will ask you to enter your admin passwords in order to give you permissions to create that folder: 
Once you have the folder, press "OK". 
BioniX is portable
BioniX Background Changer (as all other tools listed on our web site) is a portable application. This means that you can run it without any installation - just copy BioniX folder on a USB stick and take it with you.
Advanced deployment techniques
Corporate users can easily deploy Bionix Wallpaper to all computers because doesn't really need an installer. You can deploy BioniX to multiple computers by simply copying its folder to those computers via network, CD, usb stick, ftp, web download, etc. Details
Do you want more?
|
©Bionix Desktop Background Switcher |
|